A task turns a piece of work into something your project can assign, track, discuss, and complete. This guide walks you through creating your first task in AB Projects.
Create your first task
- Open your project.
- Select Tasks.
- Select Create new task.
- Enter a clear task title.
- Add any useful details, then select Save.
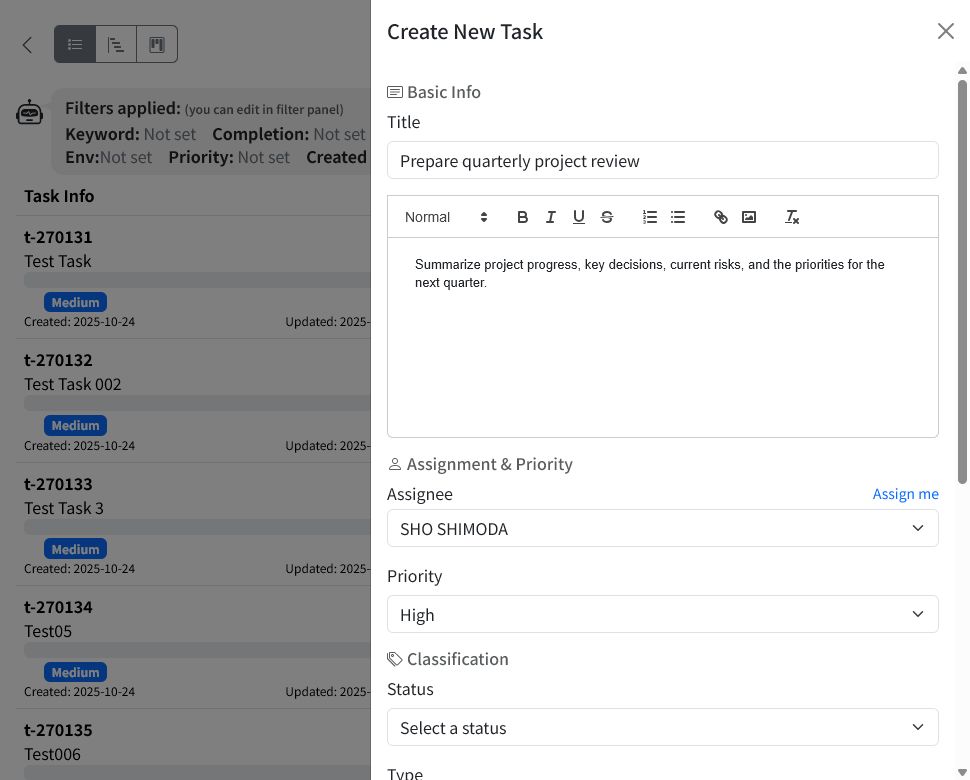
What to enter
Only the Title is required, but a useful first task usually includes:
- Title: A short description of the result you need, such as “Prepare quarterly project review.”
- Description: The context, expected result, or important instructions.
- Assignee: The project member responsible for the task. Select Assign me when you will do the work yourself.
- Priority: Choose High, Medium, or Low.
- Start Date and Due Date: Set when the work begins and when it should be finished.
- Estimated Time (hours): Add an effort estimate when it helps with planning.
Your project may also provide Status, Type, and Environment options. These choices depend on the project settings.
After you save
The new task appears on the Tasks page. Select the task to open its detail panel.
From the detail panel, you can:
- Review or update the task fields.
- Add comments and notify project members.
- Link related wiki documents.
- Add subtasks or select Suggest with AI for a proposed breakdown.
- Review the task’s change history.

Create tasks with an AI agent
An AI agent connected to AB Projects can also create tasks for you. Give the agent the task title, expected result, assignee, priority, and due date when known. The created task appears in the same task list and remains editable by the project team.
Next steps
Learn more in Creating and Editing Tasks, or continue with Setting Deadlines and Priorities.